Sunday, June 26, 2011

Black and White Cupcakes


Continuing on my quest to bake the perfect cupcake, I wanted to bake a black and white cupcake. I also knew I didn’t want a recipe that used white chocolate as the white part of the cupcake. I was looking for something creamier, something like cream cheese. Knowing what I was looking for in a recipe, I set out to find the perfect black and white cupcake recipe. After much research, I came across the following black and white cupcake recipe.

Prep Time: 15 minutes
Cook Time: 25 minutes
Total Time: 40 minutes

Ingredients
1 ½ cups flour
1 cup sugar
1/4 cup cocoa
1 teaspoon baking soda
1/2 teaspoon salt
1 cup water
5 tablespoons vegetable oil
1 tablespoon cider vinegar
1 teaspoon vanilla

Chocolate Cupcake Batter
Chocolate Chip Filling
8 ounces cream cheese 
1 egg
1/3 cup sugar
8 ounces milk chocolate chips

Chocolate Chip Filling
Directions
In a large bowl, stir together the first five ingredients. In another bowl, beat together water, oil and vanilla. Gradually add to the dry ingredients, stirring until well blended. Fill 18 cupcake liners half full of batter. Beat the filling ingredients and put a tablespoon of the filling on each cupcake, on top of the chocolate batter.

Prepared and ready to go into the oven
Bake at 350°F for 25 minutes

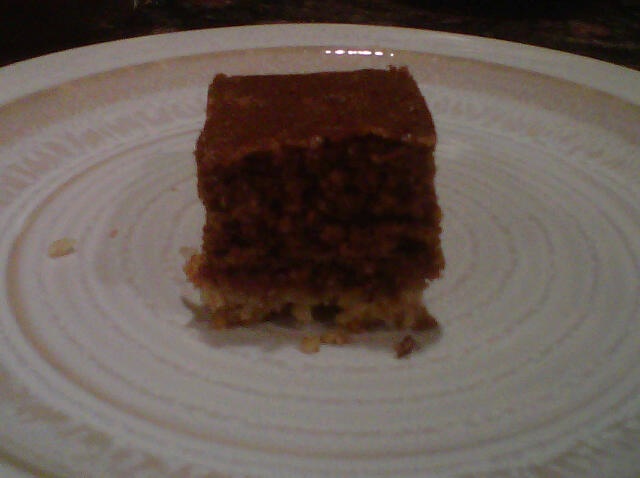
Baked and ready to eat

I made these cupcakes the day before a family get together, giving me the perfect opportunity to have several people taste the cupcakes. Everyone enjoyed the cupcakes saying the cream cheese gave the cupcakes an interesting texture. The cupcakes also came out very moist. The only change I would make to this recipe is mixing the chocolate chip filling into the batter instead of putting a tablespoon on top. I think this would give the black and white cupcakes a more even taste. 

Tuesday, June 21, 2011

Ice Cream Cake - What's Your Flavor?

With Father’s Day this past weekend, many of us were celebrating with a variety of desserts. In my house, we choose to go with a simple ice cream cake that said Happy Father’s Day. It was a small, round chocolate and vanilla ice cream cake with cookie crumbs in the middle. Vanilla frosting covered the outer part of the cake with a little blue design decorating one side on top of the cake.

Many people think ice cream cake can be difficult to make, but that is not the case. All you need is a few basic ingredients and a springform pan. Below is a simple ice cream cake recipe that can be made in the comfort of your own kitchen.

Ingredients
1 (18 ounce) package small chocolate chip cookies
1/4 cup margarine, melted
1 cup hot fudge topping
2 quarts vanilla ice cream
1 cup whipped cream
12 cherries (or other fruit or topping of your choice)

Directions
1.      Crush half the cookies (about 20) to make crumbs. Combine crumbs with melted margarine and press into the bottom of a 9-inch springform pan or pie plate. Stand remaining cookies around edge of pan. Spread 3/4 cup fudge topping over crust. Freeze 15 minutes.
2.      Meanwhile, soften 1 quart of ice cream in microwave or on countertop. After crust has chilled, spread softened ice cream over fudge layer. Freeze 30 minutes.
3.      Scoop remaining quart of ice cream into balls and arrange over spread ice cream layer. Freeze until firm, 4 hours or overnight. To serve, garnish with remainder of fudge topping, whipped cream and cherries.


What I like about this recipe is you can change up the ice cream flavor, as well as the fruit or other toppings you choose to decorate the cake with. You can also easily add two or three layers to this cake if you would like to use a variety of ice cream flavors.

Friday, June 17, 2011

Dark Chocolate Mint Three Musketeers Cookies


My office was having a potluck recently and I wanted to bring in something that was not only unique, but something that people may not have had before. For the potluck, I decided to bake Three Musketeer cookies, using the dark chocolate mint Three Musketeers mini bars.

I have been baking chocolate chips cookies for many years now. It gets repetitive when you make the same desserts over and over again. Dark Chocolate Mint Three Musketeers cookies allowed me to combine my love of dark chocolate and mint with my love of cookies. It also gave me an opportunity to expand my knowledge about baking with candy.

Making Dark Chocolate Mint Three Musketeers cookies isn’t that complicated. You just need a basic cookie recipe, as well as chopping up three-quarters of a bag of Dark Chocolate Mint Three Musketeers minis. Once you unwrap the mini bars, cut them into fours and place them in a separate bowl. You add them in at the end of the recipe just as you would with chocolate chips. 


Preparing to make the batter


Waiting to go into the oven

When you take them off the cookie sheet, just be aware that the mint from the candy bar may stick to the bottom of the tray. Use caution when taking the cookies off the cookie sheet or they may break. 


The final product

The team that I work with ate the cookies before the potluck even started. Although a few people at the potluck were disappointed that they didn’t get to try the cookies, I’m just glad that the people on my team enjoyed them.  

Wednesday, June 15, 2011

The Wonders of Homemade Pizza

Every now and then I like to write about cooking ideas outside my normal realm of baking. Today, I am going to focus on homemade pizza, a classic dinner item that we all love. The key to a successful homemade pizza lies within the dough and the quality of ingredients you use.  The dough recipe I use has been successful every time I’ve made it.  Just make sure the oven is up to temperature. Otherwise the pizza may not come out as crunchy as you would like it.

Pizza Dough Recipe
4-½ cups unbleached flour (I use 50 percent all-purpose flour and 50 percent bread flour.)
1 ¾ teaspoons salt
1-teaspoon instant yeast
¼ cup olive oil
1-¾ cups ice cold water

You need a mixer to assist you in preparing the pizza dough. Stir flour, salt and yeast in a bowl. Stir in olive oil and cold water on low speed until smooth. Mix on medium for five to seven minutes. You do not have to let the dough rise. Stick it in the fridge to enjoy it that night or in the freezer to enjoy at a later date. The dough freezes well. 

Preparing to roll out and start decorating the pizza
Homemade pizza allows you to dress your pizza anyway you like it without the extra cost. A favorite in my house is vegetable pizza containing mushrooms, black olives, pimento olives, roasted red peppers and red onions. I try and buy the vegetables pre-sliced like the mushrooms and black olives, making it easier to prepare and place on the pizza. I don’t mind cutting up a few of the ingredients, but it can be time consuming to prepare and chop so many vegetables.

Another benefit to homemade pizza is using whatever kind of cheese you like. We’ve used the basic mozzarella and Parmesan cheese, as well as Swiss cheese, three cheddar cheese blends and six cheese blends. Cheese blends usually contain a mix of cheddar, mozzarella, Parmesan, Swiss cheese and a variety of other cheeses depending on the brand you buy.

Spices are an essential part of any pizza. I love pizzas that have a variety of spices on them. Whenever I ordered pizza, I am always adding garlic powder, onion powder and oregano or Mrs. Dash, which has a combination of spices in one bottle.  However, when I am making homemade pizza I can take all these spices and bake them right into the pizza that makes the pizza taste even better. 

The final product, yummy cheese pizza.  
Everyone has a favorite pizza topping, what’s yours?

Monday, June 13, 2011

Ooey Gooey Cinnabons

Cinnabons are one of those treats that you can eat for breakfast or have as a mid-afternoon snack. Sticky and messy, cinnabuns ooze warm cinnamon and frosting when served hot out of the oven. In my opinion, this is the only way eat them.  Most people are familiar with the Cinnabon stands in food courts and rest stops throughout the country, as well as the numerous companies who make and ship them to most of our supermarkets. 


Cinnabons can now be made in the comfort of our own kitchens at half the price. All you need is a few basic ingredients and you are good to go. Below is one recipe that I found to be simple and straightforward with great results. 


Batter
  • 1/2 cup warm water

  • 2 packages active dry yeast
  • 
2 tablespoons sugar

  • 1 package Instant Vanilla Pudding Mix (3.5 Oz)

  • 1/2 cup butter, melted

  • 2 eggs, beaten

  • 1 teaspoon salt

  • 8 cups flour

  • 1/2 cup butter, melted

  • 5 each 8 or 9 Inch Square Baking Pans
Frosting
  • 8 ounces cream cheese, softened

  • 1/2 cup butter, softened

  • 1 teaspoon vanilla extract

  • 3 cups powdered sugar

  • 1 tablespoon milk
  • 2 to 3 tablespoons of maple syrup
Toppings 
  • 2 cups brown sugar, packed
  • 2 tablespoons cinnamon
Preparations
  1. In small bowl, combine water, yeast and sugar. Stir until dissolved. Set aside. Yeast should bubble. In large bowl, make pudding mix according to package directions. Mix until slightly thickened. Add butter, eggs, salt; mix well. Add yeast. Blend. Gradually add flour and knead until smooth. 
  2. Place in large greased bowl. Cover and let rise in warm draft free place until double in size, about 1 hour. Punch down and let rise again, about 45 minutes. On lightly floured surface, roll out to 34" x 21" rectangle. Spread 1/2 c melted butter over surface. 
  3. In small bowl, mix topping (brown sugar and cinnamon). Sprinkle over top of dough. Starting at the long edge of the dough, roll up very tightly. With a knife, put a notch every 2 inches. With string or thread place under roll by notch and cross cross over to cut roll. 
  4. Place 4 rolls into each baking pan, 2" apart. Cover and let rise in warm draft free place until double. Bake @ 350 for 15-20 minutes, remove when golden brown. 
  5. Combine all frosting ingredients and mix until smooth. Spread on warm rolls. Serve warm.

If you do not have the time to make cinnabons, there are several store bought options to choose from. Although nothing is as good as home baked treats, I recommend baking Pillsbury Cinnamon Rolls. When I was in college I used to love making cinnabuns for breakfast or for a snack while I was studying. I’ve tried a few brands and Pillsbury tasted the best. They also kept well for a few days after orginally baking them. What I liked about the Pillsbury Cinnamon Rolls is that the rolls tasted almost like they were fresh out of a bakery, all warm and gooey. As a college student you want home made food or as close to home made as you are going to get. When reheated the next day, the rolls still have a somewhat fresh taste to them and were not dried out or stale.

Thursday, June 9, 2011

Cookies 'n' Crème with a Twist


I love anything that has the name cookies 'n’ crème in it. This includes, but is not limited to ice cream, cheesecake and candy bars. You name it and I will probably eat it if it has cookies 'n’ crème in the name. Since brownies and cookies n’ crème rank high on my list of favorite desserts, I thought it would be fun to make cookies 'n’ crème brownies.

I started off with a basic brownies recipe that I always use. Instead of adding my normal chocolate chips or walnuts, I added about seven broken Oreos to the batter. You can add more or less depending on how much you want in your batter. I also add another four or five broken Oreos on top of the brownie batter. I love Oreos so the more the better.


Preparing the cookies 'n’ crème brownie batter.


Cookies 'n’ crème batter ready to be put into the pan.

Once the brownies came out of the oven and were cooled, I topped it off with vanilla frosting. I tried making a pretty drizzle on top of the brownies, but it turned into a mess so I frosted the whole top instead. The brownies were coated with a thin layer of vanilla frosting, but again it is up to you how much frosting you want on the brownies. I am actually glad I frosted the whole top. It tasted much more like cookies n crème then if I just put a drizzle on it. Funny how things work out sometimes, isn’t it?


The cookies 'n’ crème brownies assembled, cooked and ready to be eaten.

My family enjoyed the brownies with my brother saying these are my best brownies yet. 

Tuesday, June 7, 2011

Starbucks Petite Desserts

www.starbucks.com
After a rough day at the office, I decided to stop at Starbucks for one of my favorite coffee treats – an iced peppermint mocha. As I was waiting on line, I noticed their petite desserts. I decided to try the red velvet cupcake with cream cheese frosting and dark chocolate cupcake with peanut butter frosting to see what they taste like.

I’ve read several articles about Starbucks baking petite desserts, which are all supposed to be less than 200 calories. I figured I had nothing lose with such a small calorie count.  After all, chocolate makes everything better.

Biting into the cupcakes, I was a little disappointed. Both cupcakes were dry and tasted more like a dark chocolate and red velvet muffin respectively. The frosting on both cupcakes was good, but also tasted a little dried out. The quarter of a Reese’s Peanut Butter cup on top of the frosting was my favorite part of eating the cupcakes.

Two causes of dried out cupcakes are over baking and improper storage. I feel that if more attention was paid to the ingredients put into the cupcake and the cupcakes were stored properly, they would taste a lot better. Properly stored cupcakes should be in airtight containers, not sitting in a display cabinet and then served to customers. They should also not be refrigerated since this can also dry out the cupcakes.
www.starbucks.com

After my experience with the cupcakes, I am a little hesitant to try the Birthday Cake Pops, Sweet Squares and Red Velvet Whoopie Pie. Buying a single dessert is on the expensive side and I’m not sure it’s worth the money to try the other petite desserts. I would love to hear your opinions of the petite desserts, so please feel free to leave a comment.

As a side note, I cannot speak for Starbucks about what the baking process is or how the cupcakes stored. This is based on my personal opinion and my knowledge of cupcake baking based on my personal experiences.

Saturday, June 4, 2011

Brownies With a Twist

In my house, brownies are the top dessert. I was ecstatic when I finally found a brownie recipe my dad loved, but I quickly became bored making the same brownie recipe. I wanted to create brownies with a twist; combining ingredients you wouldn’t think go well with brownies. Knowing that baking marble cake can be a challenge, I choose to bake black and white brownies. I thought it could give me a little more of a challenge then throwing together dark chocolate and white chocolate cocoa powder.

After doing a lot of research about black, and white brownies and what ingredients you can use, I put together my own recipe. Using coconut and oatmeal for the white layer of the brownie, I was able to use ingredients not normally found in brownies, as well as challenging myself to think outside of the box.

I started with a typical brownie recipe using butter, eggs, sugar, baking powder, salt and vanilla. The twist on this recipe is using oatmeal, coconut flakes and cream. As part of the white brownie batter, the oatmeal, coconut flakes, butter, sugar, baking powder salt and cream were cooked for about 11 minutes prior to putting the chocolate brownie batter on top. Once the white brownie batter comes out of the oven, you can need to work quickly in spreading out the chocolate brownie batter since it starts to cook once is placed on top.

Overall, this brownie recipe turned out great. Everyone enjoyed the contrast of flavors between the coconut, oatmeal and soft, chewy chocolate brownie. It was something most people have not experienced when eating a brownie. I’m glad this baking experiment turned out to be a success.

Friday, June 3, 2011

Cake Decorating: An Art Form or Baking?

Picture from www.wilton.com
Watching shows like Cake Boss, Amazing Wedding Cakes and Ace of Cakes has always made me wonder if I could actually bake and decorate a fancy cake. A lot of the cake designs and shapes seem more like an art form than actual baking. I myself do not have a culinary degree and enjoy baking as a hobby. These shows made me question if I could actually bake and decorate cakes like these. I decided to do some research to see if regular bakers like use can make cakes like these and what tools we need to make them.


Sugar sheets are colorful, flexible and edible baking paper. All you have to do is peel, punch out or cut the design you want and position it on the cake. Individually packaged, sugar sheets come in reusable airtight containers. When exposed to air, sugar sheets start to dry so you need to work quickly with the designs you are creating. The one problem I have with these is they run about $4.00 for one sheet, which is costly.
Edible frosting sheets can be placed in your printer and print just like paper. Once printed, you place the paper on your cake and watch it absorb into your frosting.  It should leave a flawless image. They come in a pack of 24 and cost about $28.00, but may run a little higher for the larger sizes. You will also need to buy an edible ink cartridge that has a $90.00 fee.
Calculating in tax and a shipping and handling fee to your purchase, I think the sugar sheets may be a better option. The ink cartridges are not compatible with all printers and with a lot more frosting sheets than you need, it could end up going to waste. 
Fondant, an icing like substance, is often used to decorate and sculpt designs like figurines, musical instruments and buildings. Due to the rise in television cake shows that use fondant, it has become an increasingly popular way to decorate cakes. It is also viewed as easier to use and allows the baker to be more imaginative than using regular icing. There are several recipes to make fondant, or you can buy it or order it from your local craft store or home goods store (see below for links).
A rose made of fondant
To put figurines musical instruments and buildings on your cake, you will need to use small amounts of edible glue. You can make your own edible glue, but it needs to be prepared the day before to allow the glue to chill over night.
A trip to your local craft store or home goods store will have a variety of tools, such as decorating bags, decorating tips and stencils, and books about cake decorating to guide you in creating a unique cake.
Below are a few websites that provide cake decorating supplies. You can always type what you are looking for into one of the numerous search engines and see what comes up.
http://www.kitchenkrafts.com/category.asp?c=100000&sid=GOOGLE&TID=GL9120009&ne_ppc_id=1099&ne_key_id=11179529&ne_sadid=5901952694&gclid=CKae88LrmakCFUiA5QodUxAlvg

Wednesday, June 1, 2011

Using Food as Art


When we were in nursery school, we all made projects with different shaped and colored macaroni. My dog ate the macaroni, glue and all off of my macaroni art projects so they didn't last very long in my house. These simple art projects got me thinking about art projects to keep the little ones I babysit for busy. I'm always looking for new and fun ideas to keep the occupied. Food art projects can involve almost any non-perishable food – candy, cereal and goldfish.

The kids I babysat for loved the idea. I grabbed some macaroni, left over Halloween candy like Tootsie Roles, Twizzlers and Starburst, glue, crayons and paper. Everyone, including myself, began to make our food creations. Both of the kids really enjoyed getting creative and playing with the food, something they normally aren’t allowed to do. One of the children drew a person with crayon and used the candy to design the face and clothes. When everyone was finished we all hung our projects on the fridge.

Another baking project I like to do with the children is to make something out of a baking mix. Baking mixes are great when kids are looking to bake, but you don’t want to deal with the hassle of making homemade food. They only require a few ingredients, which the kids can easily add in and mix, as well as making clean up a lot easier. I've made banana bread, brownies and white cake all of which the kids enjoyed baking, frosting and eating. These are also great bonding times with them. That is what I enjoy the most about these projects.